Dry test
DiveIno must be tested to avoid failures and bugs. I defined the following test categories:
- Dry test - tests the software, which powers DiveIno
- Wet test - tests the hardware in a pressurized environment
- Usability test - performs test dives with DiveIno
Dry tests will be performed quite frequently during development. Lot of things have to be tested over and over including dive simulation. This post is about how to simulate real dives on DiveIno without getting wet.
Honestly this provides a really good opportinity to make sure that your DiveIno works as expected.
Requirements
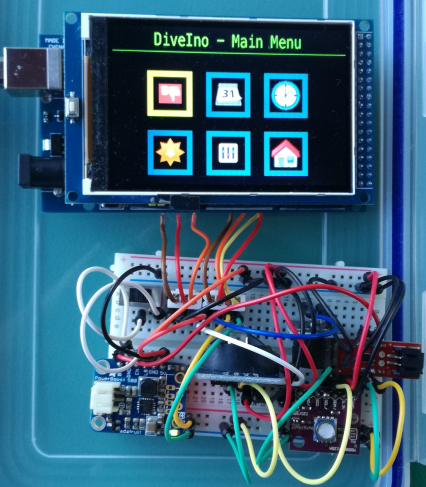
First things first you need a breadboard version of DiveIno. What is it? It is what its name suggests. All DiveIno parts connected together on a solderless breadboard. The benefit of this setup is that you don’t have to fully assemble DiveIno in order to be able to try it out.
I work with several DiveIno versions at the same time. One of them is this breadboard version, which I use for software development. Of course you also have to setup your development environment. I wrote a post about how this can be done.

Basically you have to setup your IDE, clone the DiveIno GitHub repository. Obtain the required third party Arduino libraries. Copy the images to the SD card. Verify and upload the DiveIno sketch to your breadboard version of DiveIno. If everything was successful, you should see the new DiveIno ASCII art during start up in the Arduino Serial Monitor view.
At this point the new DiveIno Serial API can be used to perform dry dives on DiveIno based on previouly logged dive profiles in DiveIno JSON format.
As you might notice only two things are missing to be able to do dry tests on DiveIno:
- Dive profiles - test data
- Dive Simulator
Dive Simulator
The Dive Simulator is able to simulate dives based on the Emulator and Replay modes built into DiveIno Serial API.
In order to showcase how such a simulator can be built, I created a demonstration version based on Node.js in the DiveInoSimulator GitHub repository. The remaining parts of this post demonstrates how this piece of software can be used.
Installation
DiveIno Serial API can talk with the attached computer through its serial port. It means that this computer has to run a software, which is attached to this serial communication port. I evaluated many options, but for my greatest surprise the easiest one was to use Node.js and node-serialport. That’s why DiveInoSimulator is based on these technologies.
The following installation steps have to be performed:
- Install Node.js
- Clone DiveInoSimulator from GitHub
- Install node-serialport
- Setup your IDE
Nowadays I use Nodeclipse for development, but WebStorm or Visual Studio Code can be used as well.
Project structure
DiveInoSimulator has the following structure:

There are several test DiveIno dive profile JSON files can be found in the data folder. Besides these - in the project root - the following interesting files can be found:
- config.json
- emulator.js
- replay.js
Configuration
The config.json file stores the configuration options, which will be loaded by emulator.js and replay.js.
1 | { |
The port property describes the serial port name. In the example it is set to COM9, which is a standard serial port name on Windows. On Linux the following format can be used: /dev/ttyUSB0
The test property identifies the DiveIno dive profile JSON file from the data folder, which will be used by the simulator.
Between each profile items in replay mode a small delay has to be inserted, because it takes some time for the Arduino Mega 2560 microprocessor to calculate the deco algorithm steps. The interval property sets this delay in milliseconds.
The baudrate defines the speed of the communication. It must be 115200.
The initialDelay property defines the initial delay in seconds between the Node.js process start and the beginning of the dive simulation.
Simulation
DiveInoSimulator prints out DiveIno serial output to the Node.js console window. It is just like to have an Arduino Serial Monitor view besides the simulator output.
You can choose, which simulation mode is preferred:
- Emulate a dive - emulator.js
- Replay a dive - replay.js
The difference between these two modes are described in the Serial API post.
The steps involved in each mode are similar:
- The right file has to be started - e.g. replay.js
- DiveIno will reset itself and the Main Menu gets displayed
- You have to put DiveIno into dive mode - just press the OK button
- Simulation - emulator or replay - starts
- Simulation ends
- The Surface Time screen will be displayed in Dive Stop mode
The time interval defined in the initialDelay property is required to conveniently perform step 2 and 3.
Clean up
As a result of each simulated dive, a new logbook entry will be created. In order to clean these up the @RESET# command can be executed through the DiveIno Serial API.
Example replay
The following excerpts are from a successful dive replay:
1 | READY |

