Development environment setup guide
DiveIno is developed with the Arduino language. According to the Arduino FAQ:
“The Arduino language is merely a set of C/C++ functions that can be called from your code. Your sketch undergoes minor changes (e.g. automatic generation of function prototypes) and then is passed directly to a C/C++ compiler (avr-g++). All standard C and C++ constructs supported by avr-g++ should work in Arduino.”
The code itself is organized into modules based on its functionality.
I use several Arduino Libraries to be able to interface with the hardware components. Some of them are created by the manufacturers or open source.
I started the development with the Arduino IDE, but for a large project like this it soon became cumbersome. I wanted to use a real IDE. Fortunately I found Sloeber.io previously called Arduino Eclipse plugin, which is a really great addition to the Eclipse IDE for Arduino development.
The development environment setup have these stages:
- Obtain the source code
- Install Sloeber.io
- Obtain and configure the required Arduino Libraries
- Import the DiveIno project
- Verify the project
- Do some additional configuration
This post will talk about how these steps can be done.
Obtain the source code
The source code is hosted in the DiveIno GitHub repository. In order to have it on your development computer you have to do the followings:
- Create a directory where you host your projects - e.g. workspace
- Clone the code from the GitHub repository:
1 | git clone https://github.com/kornel-schrenk/DiveIno |
As a result you will have the DiveIno code in your workspace.
Install Arduino Eclipse plugin
Go to the Sloeber.io website and install the latest stable version according to your OS. Basically you have to download the latest release zip file from GitHub. Unpack to a folder on your local hard drive and launch Sloeber. After that you should see something like this:
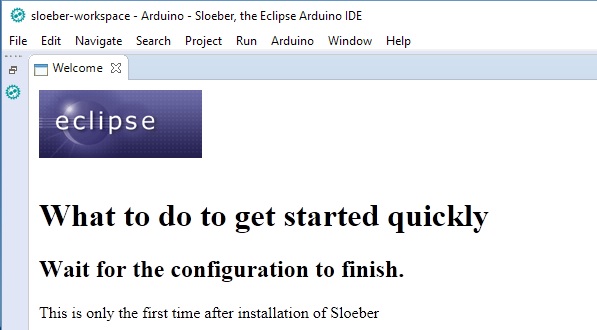
The good thing about this IDE is that it contains a pre-configured original Arduino IDE. Jan Baeyens - the man behind Arduino Eclipse plugin - explains this in more details in his Youtube video.
Optionally you can give more memory to Sloeber in the sloeber-ide.ini file. Just adjust the -Xms and -Xmx parameters like below:
1 | -startup |
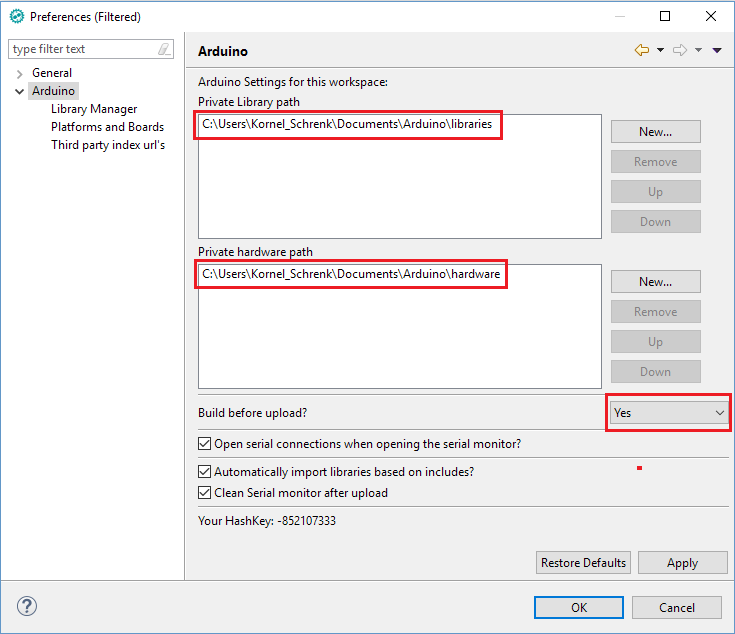
In the Arduino Preferences dialog, please make sure that the library and hardware path point to the right folders on your hard drive:
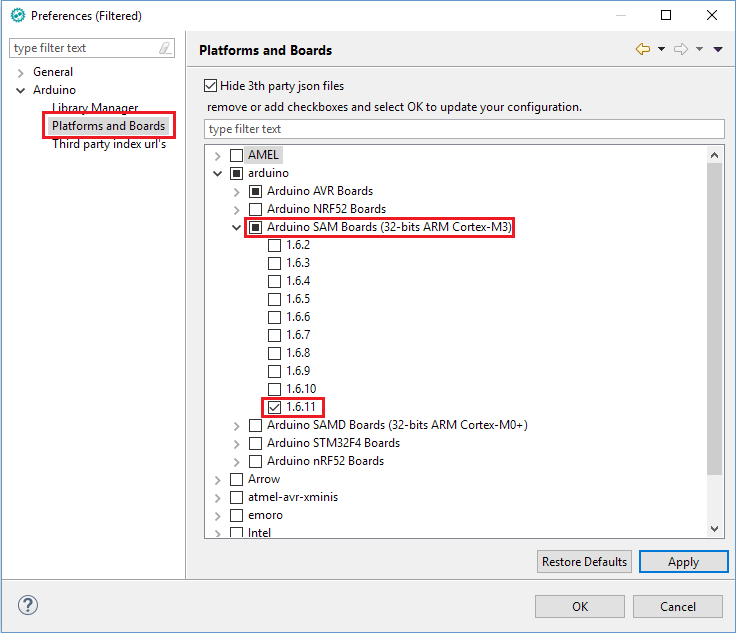
If you would like to use the Arduino Due microcontroller board, please make sure to install the Arduino SAM board support in the Platforms and Boards preferences:
Obtain and configure the required Arduino Libraries
DiveIno depends on the following Arduino libraries:
- Arduino-IRremote-Due - provides infrared remote control support
- MS5803_14 - reads out pressure and temperature data from the pressure sensor
- Time - provides time information from the RTC chip
- DS1307RTC - plug-in into the Time library
- ArduinoLib_MAX17043 - provides battery charge level information
- SdFat - supports FAT32 SD cards with long file names
- Arduino Timer Free Tone - sound generation for Arduino Due
- ArduinoJson - provides JSON file handling on the Arduino platform
- UTFT_SdRaw - loads image files from the SD card
- UTFT - responsible for the graphic display on the TFT LCD screen
- Adafruit_BluefruitLE_nRF51 - communication with the optional Bluetooth module
Please download the zip files from the URLs above. The next step is to extract the embedded folders in the zip files into the standard Arduino libraries folder. On Linux it is in your home directory. In Windows it is under the Documents folder. Let’s say that these libraries are extracted here:
1 | C:/Users/Kornel_Schrenk/Documents/Arduino/libraries/ |
Some folders have to be renamed like this:
- Arduino-IRremote-Due to IRremote2
- MS5803_14 to MS5803_14
- Time to Time
- DS1307RTC to DS1307RTC
- ArduinoLib_MAX17043 to MAX17043
- SdFat to SdFat
- ArduinoJson to ArduinoJson
- UTFT_SdRaw to UTFT_SdRaw
- Adafruit_BluefruitLE_nRF51 to Adafruit_BluefruitLE_nRF51
You have to open the .project file in the DiveIno codebase in a text editor and modify the directory references to match with your directory structure:
1 | <link> |
Once it is done, you can import the project into Sloeber.
Import the DiveIno project
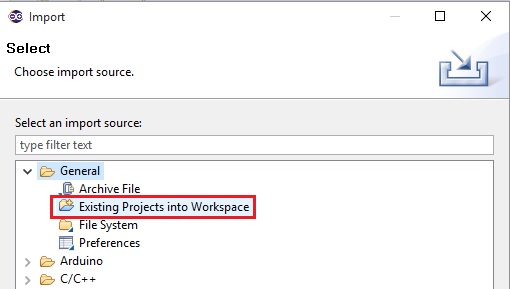
From the File/Import menu select the import Existing Projects into Workspace option:
Find the previously created DiveIno folder, where the source code of the project is located in the DiveIno subdirectory. Hit Finish and you should see something like this:
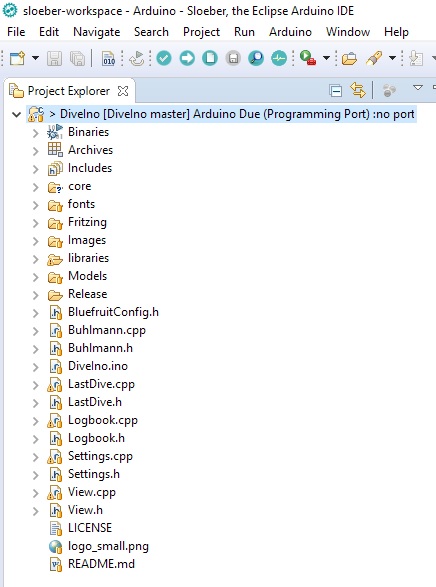
Hit Alt + Enter and select the right Arduino board settings based on your communication port:
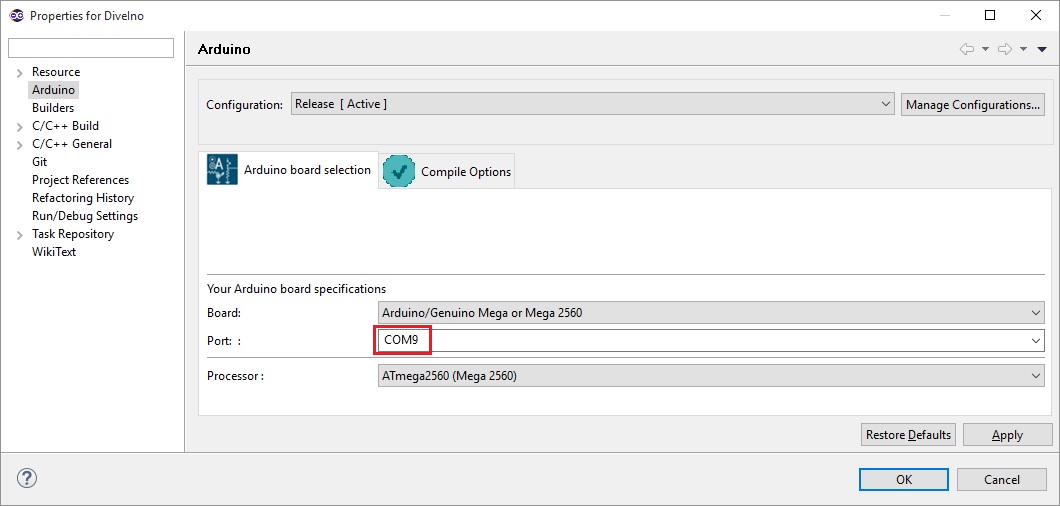
Once it is done, you have to hit the Verify button in order to check if the project can be compiled. If there is no error, you are ready to upload the DiveIno sketch onto your Arduino microcontroller board.
Additional configuration
Before you start to use DiveIno, please upload the content of the Images folder to the SD card.
The Adafruit_BluefruitLE_nRF51 library is only required, if you would like to have Bluetooth Low Energy support in DiveIno. In this case the Bluefruit LE UART Friend has to be added to DiveIno hardware setup. On the software side Bluetooth can be turned on in the DiveIno.ino file:
1 | // Manage Bluetooth support based on the Adafruit Bluefruit LE UART Friend module |

