Magnetic on/off switch and water activation
Till now it was quite cumbersome to activate dive mode on DiveIno before the dive. You had to do the followings in this order:
- Turn on DiveIno with the slide switch
- Close the Otterbox Pursuit 40 case
- Make sure that the case is water tight
- Travel to the dive site
- Use the infrared remote control to activate dive mode
- Jump into the water
This process has many drawbacks including:
- DiveIno consumes significant battery charge until you reach the dive site
- You have to bring the infrared remote control with you
- When you close the case, you can break the sealing by mistake in a big hurry
- You are unable to turn off DiveIno after the dive
Obviously some kind of solution has to be found to fix these issues, therefore I came up with two functional improvements:
- Magnetic on/off switch
- Water activation
Design
Usually when the requirements are clear it is a good idea to design the solution on the whiteboard:
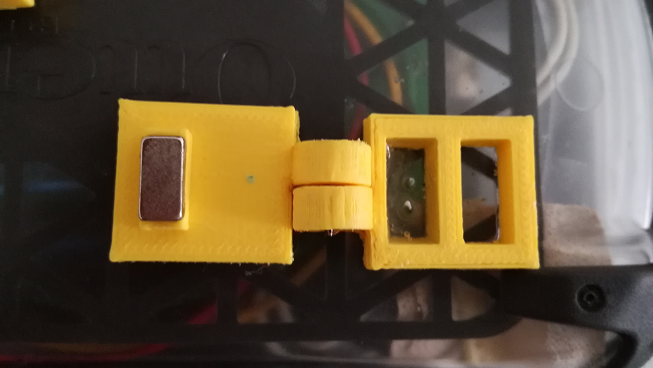
The idea is to create a 3D printed switch, which is placed onto the back side of the Otterbox Pursuit 40 watertight case. Onto the cover of the switch a magnet will be glued, which turns on and off the magnetic reed switch placed inside the case.
For water activation two solid core wires are lead through the two holes drilled into the case. It is important that from the end of the wire the plastic electronic insulator has to be stripped off.
Magnetic turn on/off
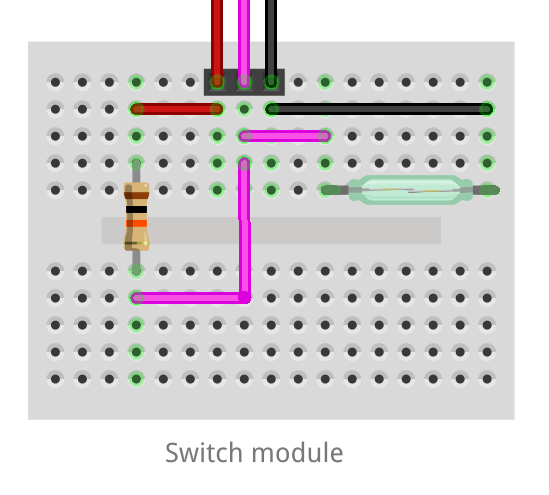
Magnetic reed switches are quite useful to build a water tight switch. If a reed tube placed into a magnetic field, the switch closes. In diving it can be used to turn things off an on without opening the watertight case. For instance dive lamps work based on this technique. The reed tube is placed on one side of the case, while the magnet is on the other side. When these two comes into a short distance within each other the swiths closes itself.
For DiveIno this solution will be used to turn it on and off without opening the Otterbox Pursuit 40 watertight case. The Switch module is responsible for this functionality:
Water activation
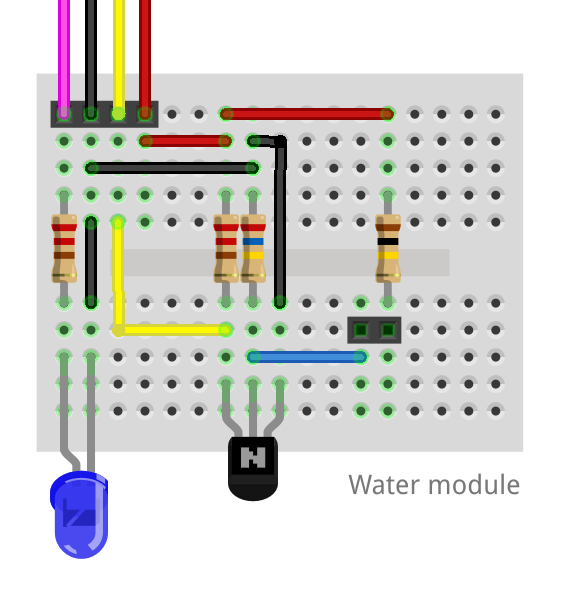
Water activation can be solved with two wires and some electronics. When both wires are placed into the water, the switch turns on and DiveIno switches into dive mode. More details about how it works can be found in the Water activated switch blog post.
The Water module of DiveIno is responsible for this functionality:
Breadboard test
Just before the case gets modified and the switch gets 3D printed, it is a good idea to test the hardware setup on a solderless breadboard.
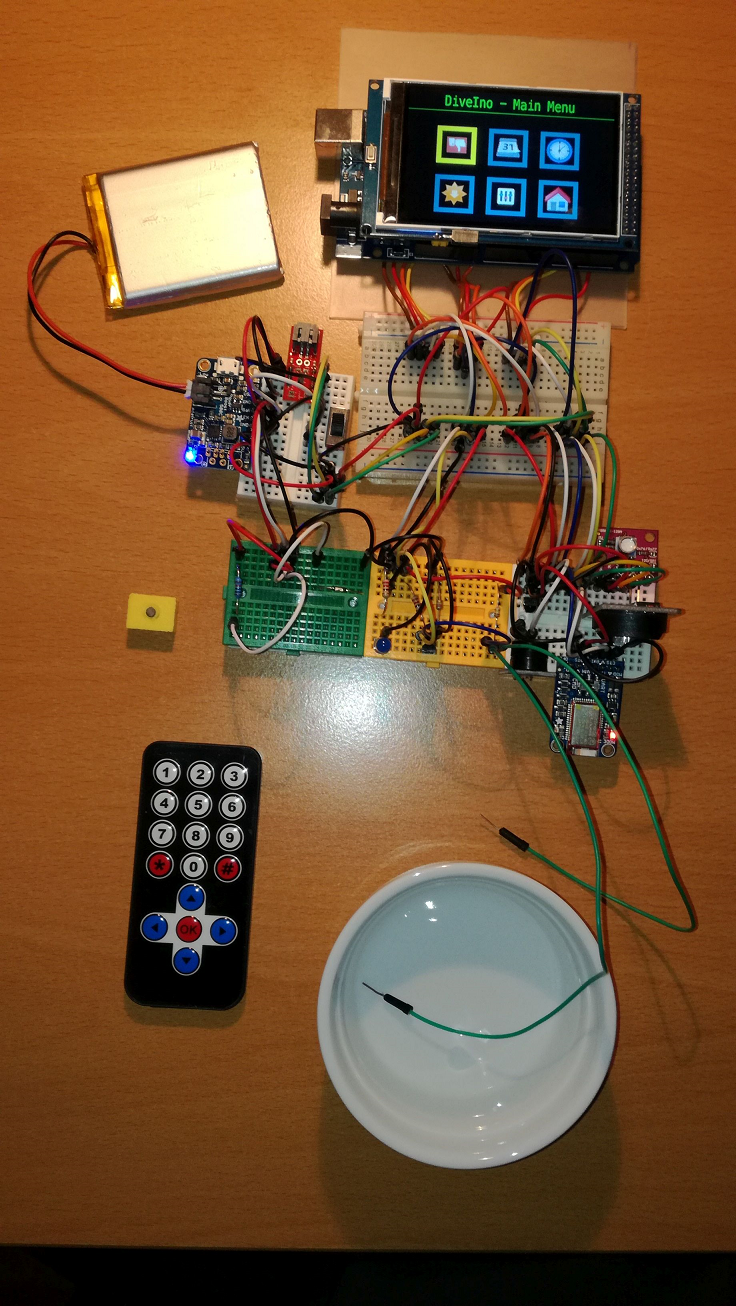
Once everything works as expected the rest of the required modifications can be done.
3D print
The case of the switch is designed and available in Tinker Cad. The .STL file has to be downloaded and sent for 3D printing. 3D Hubs collects nearby 3D print service providers, if you don’t have your own printer.
Once the switch gets 3D printed, the next step is to assemble it:
- Remove the rough edges from the print
- Use a thick steel wire to stick together the two parts
- Place the bottom part of the switch onto the Otterbox case
- Mark the place of the two wire holes
- Drill the holes
- Glue the bottom part of the switch onto the Otterbox case
- Use two component epoxy glue to insulate the wire holes from water
- Glue the magnet on top of the switch
In step 7 make sure that the tip of the wires are stripped and not covered with epoxy glue. The end result will look like this:
Once you have made all required modification, it is the right time to assemble your DiveIno and test your work.
Go to dive
During preparation and transfer to the dive site keep the switch lid closed. Once you are in the water, open the lid! Wait until DiveIno turns on - it takes only a couple of seconds. If everything seems to be fine just submerge. DiveIno will switch into dive mode bí itself. Enjoy the dive!
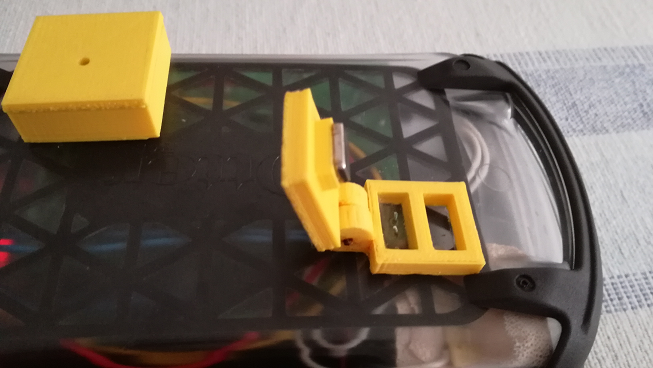
After the dive when you packed all of your equipment, you can close the lid of the switch and turn off DiveIno. This new process saves a good amount of battery power compared to the old one.
Back into the dive center you can use the infrared remote control to operate your DiveIno. For instance check your dive profile, no fly time and surface time interval.
If the battery charge level seems to be low, you can open the case and recharge the battery with a standard micro USB charger.

